Introduction
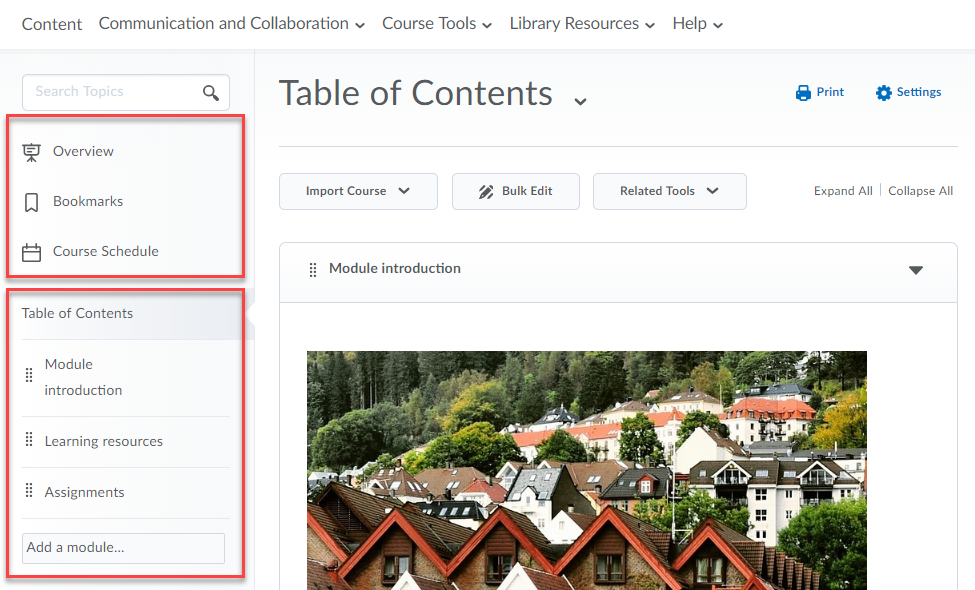
When you ask for a unit/module shell in Brightspace, certain elements exist by default. For example, in the top left of the screen you will see Overview, Bookmarks and Course Schedule (see image opposite - click to enlarge). These are fixed - they are part of every unit/module whether it is an empty shell or contains migrated content - they cannot be deleted or added to. However, the section below that, the Table of Contents, can be. And that is what this guide is about.
The Table of Contents consists of modules, sub-modules and objects. You can be as elaborate as befits your unit/module and the Course Builder makes this a fast and efficient process.
The Course Builder
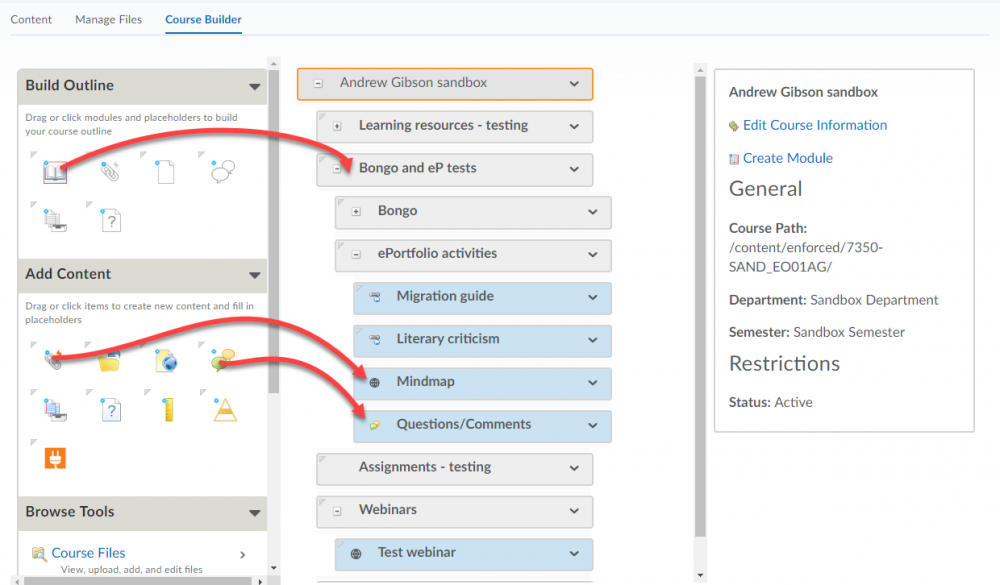
The Course Builder (go to: Course Tools > Course Administration > Course Builder) is a consolidated interface, allowing you to construct and review your entire unit/module in one place. For all that, the Course Builder is really easy to use, with drag and drop capabilities, colour-coding and intuitive iconography. Crucially, anything you construct is easy to edit. You don't need to know everything that you want to do in advance. You can try things out, see how they look, move them, delete them, start again, no problem.
With the Course Builder, as you build your unit/module you are able to see how it interacts with multiple Brightspace tools such as Content, Discussions, Assignments and Grades.
The interface
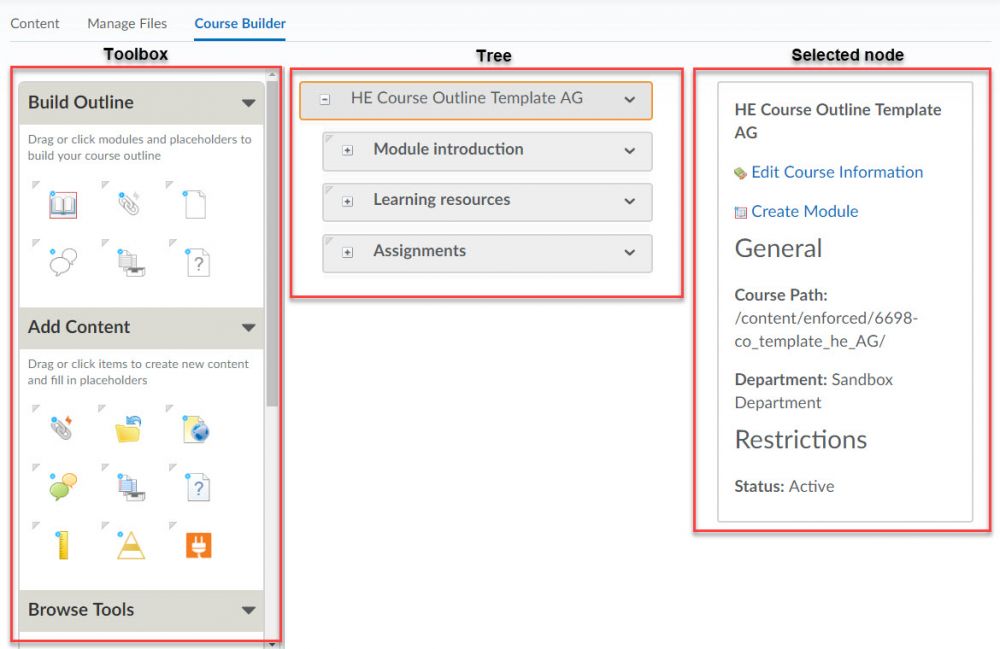
The Course Builder is made up of three vertical areas:
- Toolbox
- Tree
- Select node
Over the next few pages we will have a closer look at each of these areas.
Item |
Description |
| Node | Each structural element in the course tree is called a node. Node is a general term that can represent a module, placeholder, or object. |
| Module | A module is an organisational element that can represent different weeks, topics, or sections of your unit/module. You must create a module in the Course Builder before you can begin adding objects and placeholders. |
| Placeholder |
A placeholder is essentially a container for an object. It is not visible to learners until you add an object to it. There are five placeholder types: link, file, discussion, assignment, and quiz. Placeholders help you define the structure of your course before you are prepared to compile actual course content. This enables you to plan your lectures, discussion topics, assignments, tests, and other course activities before you begin creating them. You can populate placeholders when you are ready by creating new content or linking to existing content. For example, if the completion of a particular course unit depends on acquiring files from another resource, drag placeholders into the course tree to represent those files until you receive them. |
| Object |
Objects are the learning materials, activities, or assessments in your course. Object types include: links, learning objects, HTML files, discussions, assignments, quizzes, grade items, and learning objectives. When you create an object in the Course Builder, you are in effect creating it within its respective tool and adding it to your course content. For example, when you drag a quiz object into the course tree from Add Content, the Course Builder prompts you to enter its basic details and creates the quiz in Manage Quizzes. At a later time, you can go to Manage Quizzes to edit advanced quiz properties and add questions. |
The Toolbox
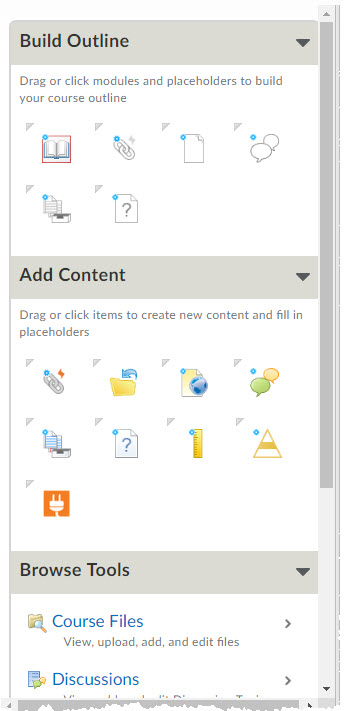
The Toolbox area of the Course Builder is divided into three sections:
Build Outline - Build Outline provides you with module and placeholder (structural but empty) elements that you can add to your course tree to create your course outline.
Add Content - Add Content provides you with a selection of objects you can create and add to the course tree or drag onto placeholders in the course tree. Direct access to object types within Course Builder enables you to bypass the complexity of setting up objects in their individual tool areas.
Browse Tools - Browse Tools displays a library of pre-existing objects in your course tools. This section of the toolbox features a drill-down menu with breadcrumb links that appear at the top of the toolbox as you navigate deeper into the menu. You can click on breadcrumb links to return to a previous section.
Tree
The course tree displays unit/module content as a hierarchy of nested ‘nodes’.
With the tree you can rearrange, copy and delete structural items. This makes the process of creating a structure for your unit/module incredibly fast. Simply bring elements over from the Toolbox - if you like the structure right off, great - if not, rearrange!
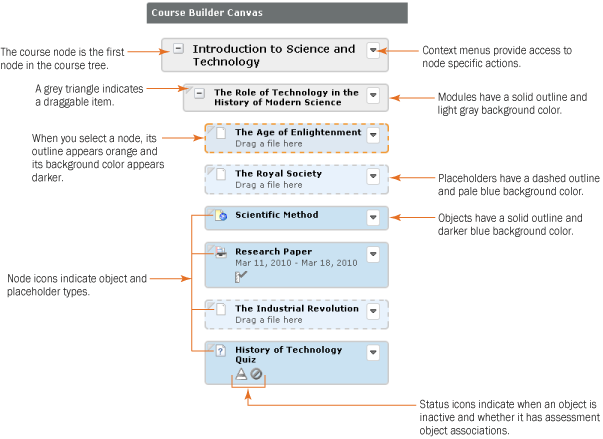
The appearance of each node denotes its type, the object type it holds, and the actions you can perform on it.
Course node
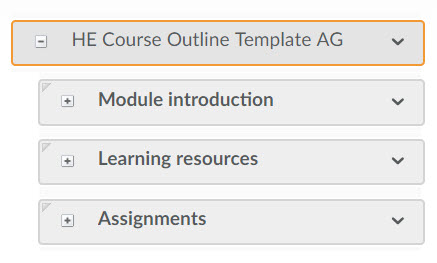
The first node in the course tree is the course node, i.e. the unit/module name (e.g. ‘HE Course Outline Template AG’). When selected, via the Selected node column on the right of the screen, you can change a limited number of things, most notably the banner image (though this is easier via the home page).
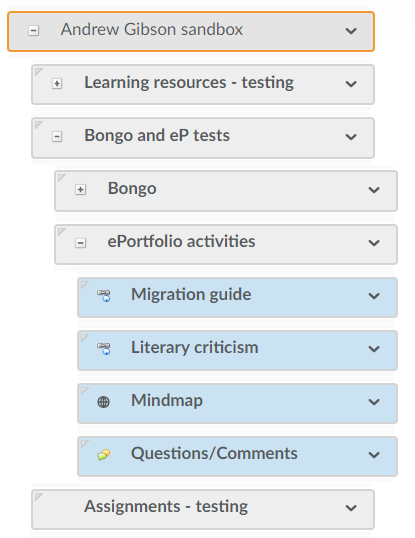
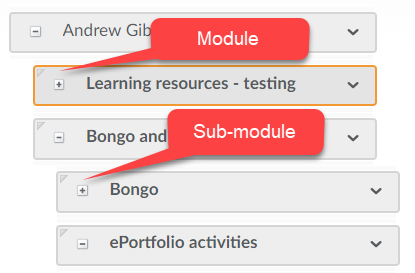
Indented one level are module nodes, followed by sub-modules (if present), then objects. Colour-coding and outlining helps to immediately identify different nodes.
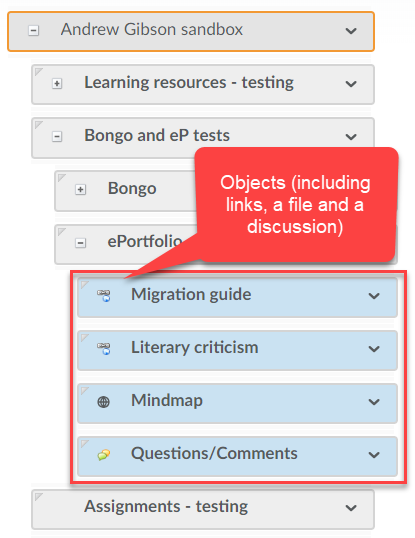
Coloured blue, object nodes represent learning materials (items, activities, links, etc.) in a unit/module (for example, a discussion forum in Week 1 of a unit/module is an object).
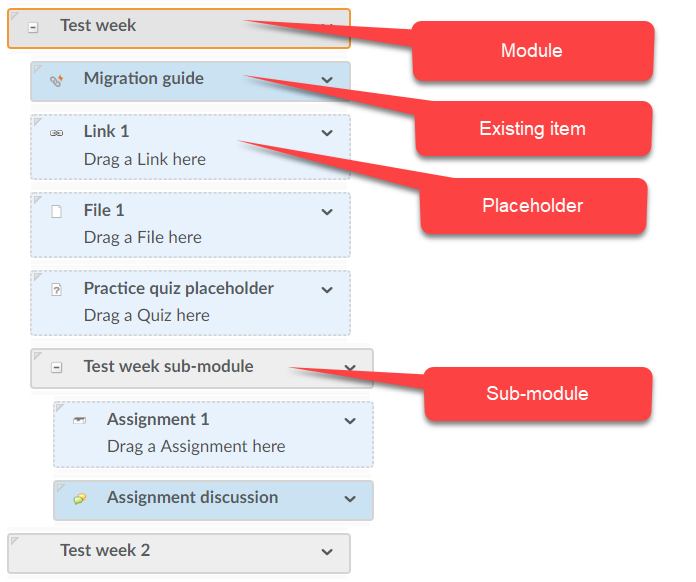
They can be either placeholders (faded with a dashed line) or existing items (solid).
The illustration opposite (from D2L) identifies some of the information listed above - and more (especially about icons, menus, etc.)
Selected node
When you select a node in the course tree, the selected node panel on the right-hand side displays its details and enables you to perform actions on that node. From the selected node panel you can:
- View general properties for an object
- Edit placeholder properties to change the display name or add planning notes
- Edit object properties
- Launch an object's associated system tool
- Perform node-related actions
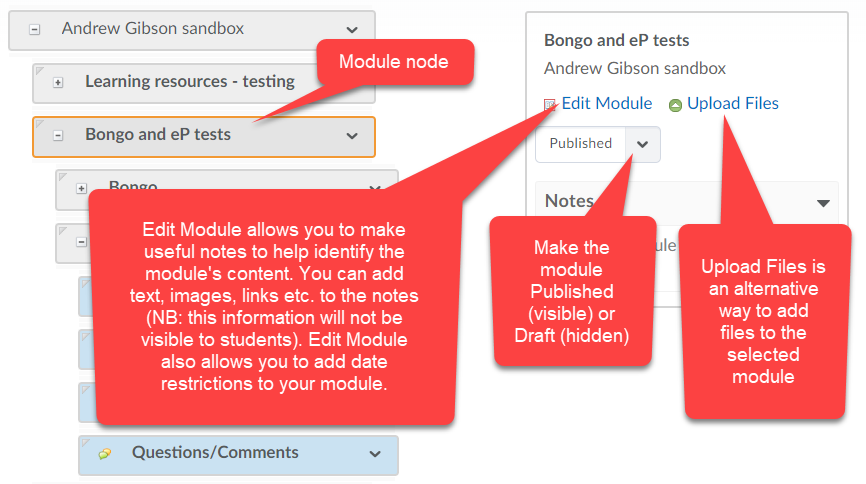
If you select a module in the course tree, the selected node panel on the right allows you do certain things (click on the image to read in more detail).
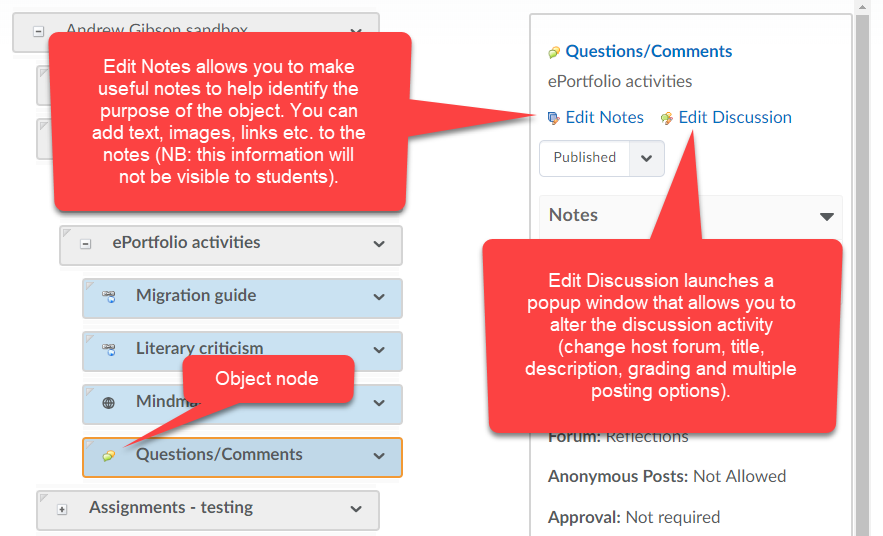
If you select an object in the course tree, the selected node panel on the right allows you do certain things (click on the image to read more detail).
Example
The example opposite shows a mock-up from a unit/module where learning materials and activities are broken into weeks.
A sub-module has been added to differentiate between content areas.
The Course Builder has been used to pull in existing objects where they exist, and include placeholders where they are yet to be fleshed out. Placeholders can be recognised by the dotted lines that surround them.
