Welcome to the Webex Help pages
Webex Meetings is the university's official virtual classroom tool which is fully integrated into Brightspace.
In this resource, you will find answers to questions you might have about Webex Meetings. The resource is organised topically and contains links to specific Webex help pages.
If you have a specific question that is not answered in this resource, you may wish to have a look at the Getting Started - Webex Meetings pages for more useful information and guidance.
.png?1597152132362)
We have found that images on Webex pages display best when you are using Google Chrome. So if you find that you cannot see the guidance properly, try switching your browser to Chrome.
Last semester, there have been some instances where unauthorised users have gain entry to virtual classroom sessions and have disrupted them.
On the following pages, you will find more information on scheduling, sign-posting and running Webex sessions and we would urge you to please remember the following as you use the virtual classroom:
- Wherever possible, virtual classroom sessions should be scheduled via the Webex integration in Brightspace as this will generate a Join link allowing students to join directly from within Brightspace. If students ask you how to join, please sign-post the Webex student guide to them where they will find detailed information on accessing Webex sessions in Brightspace.
- If you have to schedule virtual classroom sessions using uhi.webex.com, i.e. because you need to schedule a session for a smaller group, you must not distribute the joining link via email as students email accounts can be hacked. You must sign-post the link via Brightspace using release conditions to share it with the particular group.
- If you are required to admit students to a Webex session manually, please make sure to read through the list of participants asking to be admitted and only admit students who are officially enrolled on your module / unit / course.
About using this resource
How to navigate the resource:
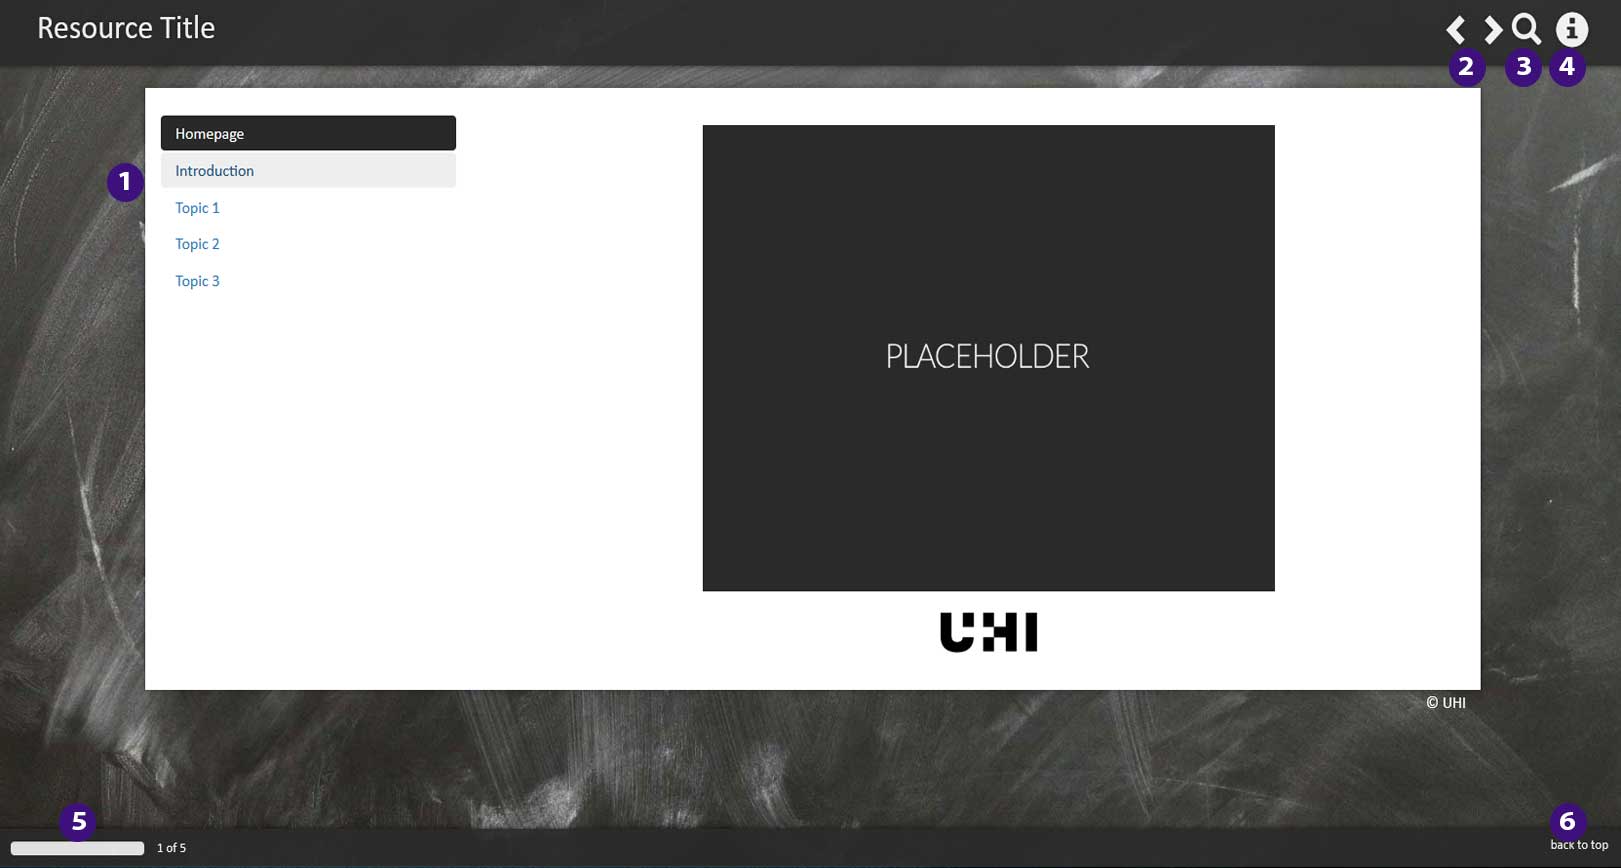
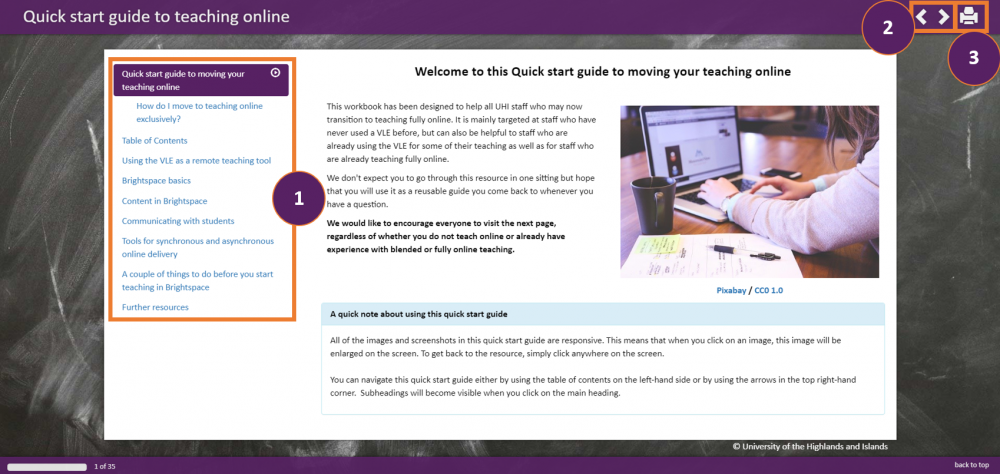
- Use the menu on the left-hand side to jump to a particular page (1), or
- Use the arrows in the top right-hand side corner of the resource to navigate to the next page within the resource (2).
How to print the resource:
- Use the print button in the top right-hand side corner of the resource to print the resource as a PDF (3).
 Screenshot of navigation options and print option
Getting started in Webex
Webex is the university's official virtual classroom tool which is fully integrated into Brightspace.
In this resource, you will find answers to questions you might have about Webex. The resource is organised topically and contains links to specific Webex help pages.
You will find more answers to questions you might have about specific topics on the following pages, but may also wish to have a look at the Get Started - Webex pages for more useful information and guidance.

As you schedule, sign-post and run your virtual classroom sessions using Webex, please keep in mind the duty of care all university staff is required to discharge in day-to-day work.
Last semester, there were been some instances where unauthorised users gained entry to virtual classroom sessions and have disrupted them.
On the following pages, you will find more information on scheduling, sign-posting and running Webex sessions and we would urge you to please remember the following as you use the virtual classroom:
- Wherever possible, virtual classroom sessions should be scheduled via the Webex integration in Brightspace as this will generate a Join link allowing students to join directly from within Brightspace. If students ask you how to join, please sign-post the Webex student guide to them where they will find detailed information on accessing Webex sessions in Brightspace.
- If you have to schedule virtual classroom sessions using uhi.webex.com, i.e. because you need to schedule a session for a smaller group, you must not distribute the joining link via email as students email accounts can be hacked. You must sign-post the link via Brightspace using release conditions to share it with the particular group.
- If you are required to admit students to a Webex session manually, please make sure to read through the list of participants asking to be admitted and only admit students who are officially enrolled on your module / unit / course.
Just as a reminder:
We have found that images on Webex pages display best when you are using Google Chrome. So if you find that you cannot see the guidance properly, try switching your browser to Chrome.
From the beginning of AY 2020/2021, you should use Webex if you need to schedule virtual classroom session. It is fully integrated with Brightspace and can be accessed via the Communication and Collaboration drop-down menu in your module / unit / course.
We would recommend that you and your students run Webex via Google Chrome. Firefox and Edge will work just fine but we have found that using Firefox, for instance, you will need to complete a number of Captcha tests before being able to create a virtual classroom session while the same does not happen when you use Webex via Google Chrome.
For more information on how to access Webex via Brightspace for the first time, please refer to this Introduction to Webex in Brightspace.
Scheduling and signposting Webex sessions
On this page, you will find more information about scheduling and signposting Webex sessions.
If you have any questions in addition to the ones posed below, you may wish to have a look at the Get Started - Webex pages for more useful information and guidance.
Just as a reminder:
We have found that images on Webex pages display best when you are using Google Chrome. So if you find that you cannot see the guidance properly, try switching your browser to Chrome.
If you would like to invite an external participant to a Webex session, you will need to do so using their email address. Start by scheduling your session via the Webex integration in Brightspace. More information on how to schedule a session via the Webex integration in Brightspace can be found in this Introduction to Webex in Brightspace guidance. Once you have done so, follow the steps below:
Step 1: Go to the UHI Webex homepage.
Step 2: Sign in using your UHI email address (id@uhi.ac.uk) and password. You will find the sign-in button in the top right-hand side corner of the screen.
Step 3: Once you are signed in, select Calendar at the left-hand side.
Step 4: Locate the relevant meeting and click on its title.
Step 5: Enter the email address at the right-hand side under Who is invited? and press enter.
Step 6: The email is sent to the guest and their name should appear under the email box.
If you require to remove the guest for some reason later, then return to the booking and click the … next to their email address and click Remove. The guest will receive an email informing them the meeting has been cancelled.
Yes, you as well as the students can export an appointment for a Webex session to your respective Outlook calendars. To ensure that any Webex session appointment can be exported, you should first make sure that you Authorize with LMS. More information about how to do this can be found on page 3 in the Introduction to Webex in Brightspace guidance.
Once you have done this, any Webex session you schedule will automatically also create an event in the Brightspace module / unit / course calendar. You can now download the calendar with its events and add it to your Outlook calendars via the Subscribe function in the Brightspace Calendar tool. For more information and step by step guidance, refer to this guide on How to export a calendar from Brightspace.
The Webex Office Hour function is best suited to schedule 1:1 consultations with students. If you would like to meet with a group of students, schedule a Webex Meetings session instead and call it “Office Hours”.
For more information on how to schedule Office Hours via the Webex Office Hour feature, refer to the section on this topic on the Webex for Teachers help pages.
Any Office Hours that you set are common across all your modules / units / course where you enable the use of them. If a student books a slot on module 101, that slot is no longer available to students on module 102 or 103, for example.
If you would like to sign-post information for your students on how they can book an Office Hour slot with you, you can refer them to the section on this topic on the Webex for Students help pages.
Running a Webex session via Brightspace
On this page, you will find more information about running a Webex session via Brightspace.
If you have any questions in addition to the ones posed below, you may wish to have a look at the Get Started - Webex pages for more useful information and guidance.
Just as a reminder:
We have found that images on Webex pages display best when you are using Google Chrome. So if you find that you cannot see the guidance properly, try switching your browser to Chrome.
When you or students join a Webex session for the first time ever in Brightspace, you must do so via the Webex interface in Brightspace which can be accessed via the Communication and Collaboration drop-down menu (Figure 1).
Once you have joined a Webex session this way once, you will also be able to join further sessions in the future via the Join Meeting link in the appointment that will automatically be created in your module's / unit's / course's calendar when you create the sessions (Figure 2).
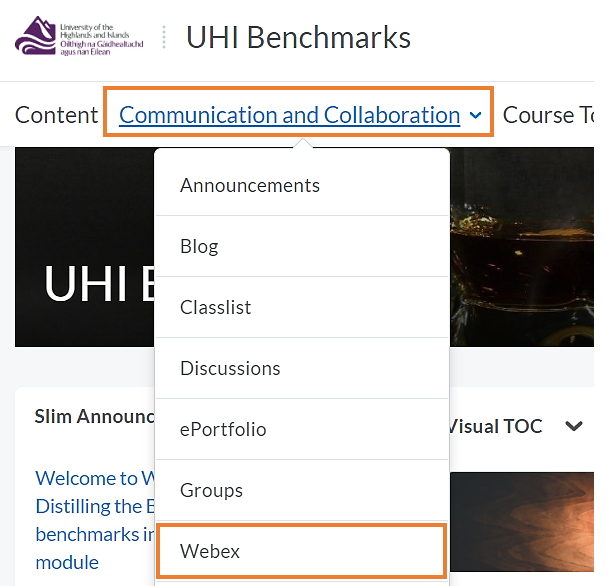 Figure 1: Module / Unit / Course homepage with the Communication and Collaboration drop-down menu
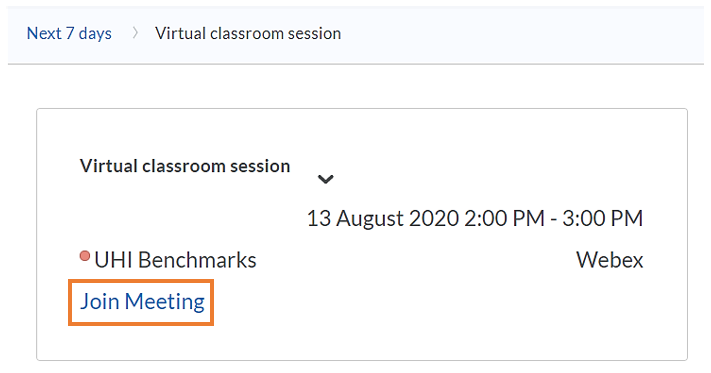 Figure 2: Webex Meetings appointment in the Brightspace calendar with the Join Meeting link
For more information on joining a Webex session, as well as how to get started in the interface, refer to the following pages:
You can find answers to a lot of other questions in this resource or can explore the Get Started - Webex Meetings pages for more information about Webex Meetings.Currently there can only be a single host in a Webex meeting. It can be passed to another participant, but you would no longer be the host. There is now an option to add participants as co-hosts. To add a participant as a co-host:
Step 1: Go to the UHI Webex homepage.
Step 2: Sign in using your UHI email address (id@uhi.ac.uk) and password. You will find the sign-in button in the top right-hand side corner of the screen.
Step 3: Once you are signed in, select Meetings Calendar at the left-hand side.
Step 4: Locate the relevant meeting and click on its title.
Step 5: Click edit – pencil icon to the left of the green start meeting button
Step 6: In the invitees box enter the id or name of the UHI participant you wish to be a co-host. Notes: You can have multiple co-hosts. Only UHI participants can be assigned the co-host role in advance. If you have an external you wish to be a co-host this can only be assigned within the meeting once it has started.
Step 7: Click the person icon next to the user’s name to make them a co-host, it will turn blue (circled in picture below).

Step 8: Scroll down and save. The co-host(s) will now receive an email from Webex. They must use the join instruction within this to join the meeting as a co-host. If they were to join via Brightspace they would not be assigned the co-host role. No
If you require to remove the co-host role for some reason later, then return to the booking and click the blue person icon next to their name. The guest will receive an email informing them the meeting has been cancelled.
The maximum number of participants you can see on screen at any one time is 81 (nine rows of nine participants) if you are not using the whiteboard or sharing your screen. You can then scroll through the rest of the participants using the arrows which will appear on either side of the participant grid.
When you are using a whiteboard or are sharing your screen, you will see a number of participants at the top of the screen. In this view as well, you can scroll through the rest of the participants using the arrows which will appear on either side of the participant line-up at the top of your screen.
For more information on the different video layouts, refer to this page.
For more information on adjust your grid view views, refer to this page (https://help.webex.com/en-us/article/nc7stveb/Adjust-how-many-participants-appear-in-grid-view-in-meetings,-webinars,-and-events).
For more information on how switch between shared content and the speaker, refer to this page.
If you would like to prioritise seeing participants who have their videos switched on, you can choose to hide non-video participants. For more information, refer to this page.
Sessions run via Webex can each accommodate up to 1000 students.
Yes, you can share audio or video with audio in a Webex session. For more information and guidance on how to do this, refer to the Share Motion and Video Content help page.
Using breakout sessions in Webex
Breakout sessions in Webex don't have all the features that you will find available to you within the main meeting but this is still a robust tool to use for a number of different scenarios. You will find out more about the differences between Breakout sessions in Webex as well as use case scenarios on the next pages. .
Just as a reminder:
We have found that images on Webex pages display best when you are using Google Chrome. So if you find that you cannot see the guidance properly, try switching your browser to Chrome.
Breakout sessions Webex
In Breakout sessions students will be able to share their audio and video. They will also be able to share their screen if they have joined the Webex session from the desktop app.
More information on the known issues and limitations for breakout sessions.
Just as a reminder:
We have found that images on Webex pages display best when you are using Google Chrome. So if you find that you cannot see the guidance properly, try switching your browser to Chrome.
Option 1 - End all breakout session
When you want students to return from their breakout rooms to the main session, you can end all breakout sessions. To do so navigate to the Breakout Session panel on the right-hand side of the screen or use the Breakout session drop-down menu in the menu bar of the Webex session and select End All / End Breakout Sessions. All participants receive a message that their breakout session ends in 30 seconds.
It is probably best to give students a bit more warning than 30 seconds to make sure they can finish up any discussion or other work they are doing in their group. To do so, you can broadcast a message to all breakout rooms. Locate the Breakout session drop-down menu in the menu bar of the Webex session and select Broadcast Message. In the pop-up window select to broadcast the message either to the Presenters only or to All Attendees and type your message. Once you have send the message, a pop-up window with the message will appear in the breakout rooms for the presenters or all attendees to see.
Option 2 - Ask all participants to return from a breakout session
Instead of ending the session for students and forcing them back into the main room, you can also ask participants to come back themselves. To do so, select the Breakout session drop-down menu in the Webex session menu bar and select Ask All to Return. All participants in breakout sessions receive a message asking them to return to the main training session. They can choose to leave the session or continue.
Again, it might be a good idea to use the Broadcast Message function at points during the breakout session and toward the end to let them know how quickly you want students to return.
More information can be found on the Breakout Sessions in Webex Meetings and Webex Webinars page.
Breakout Session panel on the right-hand side of the screen in the main session. Locate the breakout session you want to join and click on it. It will now appear with a solid blue background. You can now join the session by clicking on the grey Join button in the bottom right-hand side corner of the Breakout session panel.
Recording a Webex session
On this page, you will find more information about recording Webex Meetings sessions.
If you have any questions in addition to the ones posed below, you may wish to have a look at the Get Started - Webex pages for more useful information and guidance.
Just as a reminder:
We have found that images on Webex pages display best when you are using Google Chrome. So if you find that you cannot see the guidance properly, try switching your browser to Chrome.
For more information and some FAQ on recording Webex sessions, refer to this page.
Important: To make sure that recordings are available in Brightspace after the virtual classroom session, you must join the virtual classroom session you would like to record from within the Webex integration in Brightspace.
An extra step needs to be taken to record a whiteboard or the share file option.
Step 1: Click Share menu item, top left
Step 2: Choose Share My Meeting Window this shares the Webex meeting application
Step 3: Click the Share content button, bottom of screen
Step 4: Scroll down to New whiteboard and click Share. The whiteboard activity will now be captured in the recording.
Additionally, you can if you wish minimise your self-view image from the bottom right and you can also hide the menu bar at the top left to clean up what is being broadcast and recorded.Step 1: Go to the UHI Webex homepage.
Step 2: Sign in using your UHI email address (id@uhi.ac.uk) and password. You will find the sign-in button in the top right-hand side corner of the screen.
Step 3: Once you are signed in, select Recording at the left-hand side.
Step 4: Locate the recording and click on it to open it.
Step 5: You can now follow the instructions on this page to trim your recording.
Yes, you can. If you did not join your Webex session from Brightspace, the recording will be stored on the UHI Webex server instead. A link and password to the recording can be recovered from there by the host who originally set up the Webex session in Brightspace.
Step 1: Go to the UHI Webex homepage.
Step 2: Sign in using your UHI email address (id@uhi.ac.uk) and password. You will find the sign-in button in the top right-hand side corner of the screen.
Step 3: Once you are signed in, select Recording at the left-hand side.
Step 4: Locate the recording.
Step 5: You can now share the link to the recording and the password in Brightspace.
Webex Office Hours and Attendance Grading
On this page, you will find more information about the Webex Office Hours and Attendance Grading features.
If you have any questions in addition to the ones posed below, you may wish to have a look at the Get Started - Webex pages for more useful information and guidance.
Just as a reminder:
We have found that images on Webex pages display best when you are using Google Chrome. So if you find that you cannot see the guidance properly, try switching your browser to Chrome.
The Webex Office Hour function is best suited to schedule 1:1 consultations with students. If you would like to meet with a group of students, schedule a Webex Meetings session instead and call it “Office Hours”.
For more information on how to schedule Office Hours via the Webex Office Hour feature, refer to the section on this topic on the Webex for Teachers help pages.
If you would like to sign-post information for your students on how they can book an office hour slot with you, you can refer them to the section on this topic on the Webex for Students help pages.
Webex mobile app resources
On this page, you will find more information about the Webex for mobile.
If you have any questions in addition to the ones posed below, you may wish to have a look at the Get Started - Webex pages for more useful information and guidance.
Just as a reminder:
We have found that images on Webex pages display best when you are using Google Chrome. So if you find that you cannot see the guidance properly, try switching your browser to Chrome.
Troubleshooting
If you have any issues or questions which are not answered in this resource, please visit the Get Started - Webex pages as well as:
If you cannot resolve your issue with these resources, please raise a Unidesk ticket.
Just as a reminder:
We have found that images on Webex pages display best when you are using Google Chrome. So if you find that you cannot see the guidance properly, try switching your browser to Chrome.