Before you start using the Brightspace ePortfolio
Brightspace ePortfolio vs. Mahara
The Brightspace ePortfolio has the advantage that it is fully integrated wth Brightspace. It will allow you and your students to use other Brightspace tools such as Forms and Rubrics and can be linked to learning objectives created via the competency tool. The use of forms will be covered in this resource under 'ePortfolio items and use cases'.
There is another portfolio tool called Mahara. For more information, have a look at the guidance on the use of Mahara.

What this resource is all about

This resource covers...
... an introduction to the ePortfolio tool, including...
- what you can do with it;
- where to find it;
- an explanation of how it is organised;
- settings for the Brightspace ePortfolio;
... information about the different types of ePortfolio items and use cases;
... best practice information and tips;
... tried and tested UHI use cases.
All you need to know about the Brightspace ePortfolio
On the following pages, you will find information on:
- What you and students can do with the Brightspace ePortfolio;
- How to access the Brightspace ePortfolio tool;
- How the ePortfolio tool is organised;
- Brightspace ePortfolio settings.
Please note that you can enlarge any of the screenshots on the pages in this section by clicking on them.
Once you have viewed the enlarged image, click anywhere on the screen to return to the page.

What you can do the Brightspace ePortfolio
Students
Students can...
-
create their own presentations, collections and reflections or use presentations or collections provided to them;
-
can import artifacts like images, files, quiz and assignment results as well as grades;
-
can reflect on artifacts and other ePortfolio items;
- complete forms set up by their lecturer;
-
can share ePortfolio items with the lecturers and other people or groups;
-
can let lecturers, other people or groups comment on, edit and/or assess their work.


Instructors
Instructors can...
-
create presentations, collections and reflections;
- supply students with presentations and/or collections to make it easier for them to collect and organise their evidence;
-
share ePortfolio items with the students and other people or groups to collaborate with them;
-
comment on and assess students' ePortfolio items.
Where to find the Brightspace ePortfolio
There are two ways of getting into the Brightspace ePortfolio tool.
You can either navigate to the ePortfolio from your Brightspace homepage by clicking on the 'My Brightspace' drop-down menu... (Figure 1)

... or you can get to the ePortfolio by clicking on the 'Communication and Collaboration' drop-down menu in any of your modules/units in Brightspace (Figure 2).

Once you are in the Brightspace ePortfolio, you will see the following landing page (Figure 3):

How the Brightspace ePortfolio tool is organised
On the top of the ePortfolio landing page, you will see four tabs - 'ePortfolio', 'My Items', 'Explore', and 'Sharing Groups'.
The 'ePortfolio' tab provides you with:
- an overview of your own ePortfolio items (default sorting: updated last);
- ePortfolio items shared with you by others (default sorting: updated last);
- some quick links for adding files or links, creating a new presentation or collection;
- and an overview of your unread invites (Figure 4).
- This text field provides you or students with a quick way of adding a reflection. You can enter text, as well as add tags, files and links.
- Here you can filter items you see below.
- This is the list of all ePortfolio items you created as well as all ePortfolio items shared with you.
- This area allows you and your students to quickly start building new presentations or collections, as well as add other items, such as web documents, form responses and course results.
- This area will show any unread invitations to see, comment on or assess items other users have shared with you.

The 'My Items' tab will take you to a page, where you will be able to see all your personal ePortfolio items at a glance (Figure 5).
- These buttons allow you or your students to add different types of artefacts (reflections, links, files, web documents, form responses and course results) as well as create new presentations or collections and perform other actions such as adding items to a presentation or collection, delete items, or import/export pages or items.
- This feature lets you sort results by modification date (oldest or newest first) or by alphabet.
- Here you can filter items you see below by the various different types of ePortfolio items that exist.
- Here you can filter items you see below by 'shared' or 'unshared'.
- This is a list of your personal ePortfolio items.

The 'Explore' tab is yet another page where you can browse for ePortfolio items, in this case items that were shared with you by other users (Figure 6).
To make it easier to find a particular student, there is a Search box in the top right-hand side corner which you can use to look for specific students.
- Here you can filter items you see below by the various different types of ePortfolio items that exist.
- This feature lets you sort results by modification date (oldest or newest first) or by alphabet.
- This is a list of all ePortfolio items shared with you.
- Here you will be able to see the name of the person who shared these items with you.

The 'Sharing Groups' tab finally, will allow you to manage any sharing groups you might have. These could be a group of colleagues students' work needs to be shared with automatically or specific groups of students you would like to share items with (Figure 7).
We would not recommend creating your actual Sharing Groups in the Sharing Groups tab. Instead, create the groups in the Sharing Groups tool which you can access from your module/unit via Course Tools > Course Admin.
Please contact the Educational Development Unit for more general information on the Sharing Groups tool as well as for help to set them up and use them.

Brightspace ePortfolio Settings
You will be able to get to your Brightspace ePortfolio settings from any of the four tabs by clicking on the settings button on top right-hand side. (Figure 8)

By changing the number under 'Default list size', you can customise the number of items you would like to see displayed on any of the lists of items you can see under 'ePortfolio', 'My Items' and 'Explore'.
By changing the number under 'Number of activities on newsfeed items', you can control how many activities you would like to see for each of the items on your list. With the current setting of 2, I would only see the last 2 activities performed on an item. Example: If I have a presentation that I edited (activity 1) and that three people commented on (activities 2-4), I would only see a notification about the last two activities performed, i.e. last two comments, and would then get an option to load any previous activity.
By checking the box under 'My Modifications', you will be able to see a history of your own personal edits, comments, etc. on your personal items.
By changing the number under 'Number of unread invites on dashboard', you can control how many invites you would like to see displayed at a time.
(Figure 9)

By checking the boxes under 'Item feedback', you can set a default for allowing comments and assessment. You will then always still have the option to uncheck these boxes for any items you create if you want to disable commenting or assessment for any of them (Figure 10).

This area allows you to manage any users you wish to ignore. This means that you will not see their items anymore. You can, however, always restore their items again by simply removing them from the ignore list. (Figure 11)

This is where you could select a default sharing group if you would like to automatically share any items with certain people once you have created them. You could then filter which item types you would like to share automatically with them, or you could set a certain tag or group of tags. If you decide for the latter option, any item that has the tags associated with the sharing group attached to it would automatically be shared with a sharing group. (Figure 12)

ePortfolio items and potential use cases
On the following pages, you will find information on the following types of ePortfolio evidence:
- Artifacts (images, files, course results);
- ePortfolio Collection;
- ePortfolio Presentation;
- ePortfolio Reflection;
- Brightspace Form Responses.
Please note that you can enlarge any of the screenshots on the pages in this section by clicking on them.
Once you have viewed the enlarged image, click anywhere on the screen to return to the page.

Artifacts
One group of Brightspace ePortfolio artifacts are module unit/results students can add to their ePortfolio.
Artifacts include:
- Quiz results;
- Assignment results and submissions;
- Grades.
Students can attach reflections to these items and share them with other users.
Use case
Students use the ePortfolio as a reflective tool. They can add course results and reflect on their progress in a given module/unit, or even over the course of a whole program.

A second group of Brightspace ePortfolio artifacts are any images, documents or files students add to their ePortfolio.
Use case
Students can use the Brightspace ePortfolio for peer-review exercise. Have students upload a document for peer-review into their Brightspace ePortofolio. Students can then add a rubric to their new ePortfolio item and share it with peers for peer evaluation.

Collection

Collections allow students to organise ePortfolio items they might want to share with others in bulk, either automatically or manually.
Collections can be evaluated as a whole using rubrics that you attach to the collection.
Use case
Have students use collections to organise their ePortfolio and collect evidence over the course of the semester. Have them share the collection with you rather than individual items to assess a collection of ePortfolio items holistically.
Presentation
Presentations provide an opportunity to organise and present ePortfolio items in one file that is similar to a webpage. Presenting evidence this way is more visually appealing and easier to evaluate.
For more information, refer to the sample presentation below.
Use case
Have students create a presentation or use a presentation you provided to them to showcase their learning by adding artifacts (course results, images, files), ePortfolio reflections or form responses to their presentation.

Sample Presentation

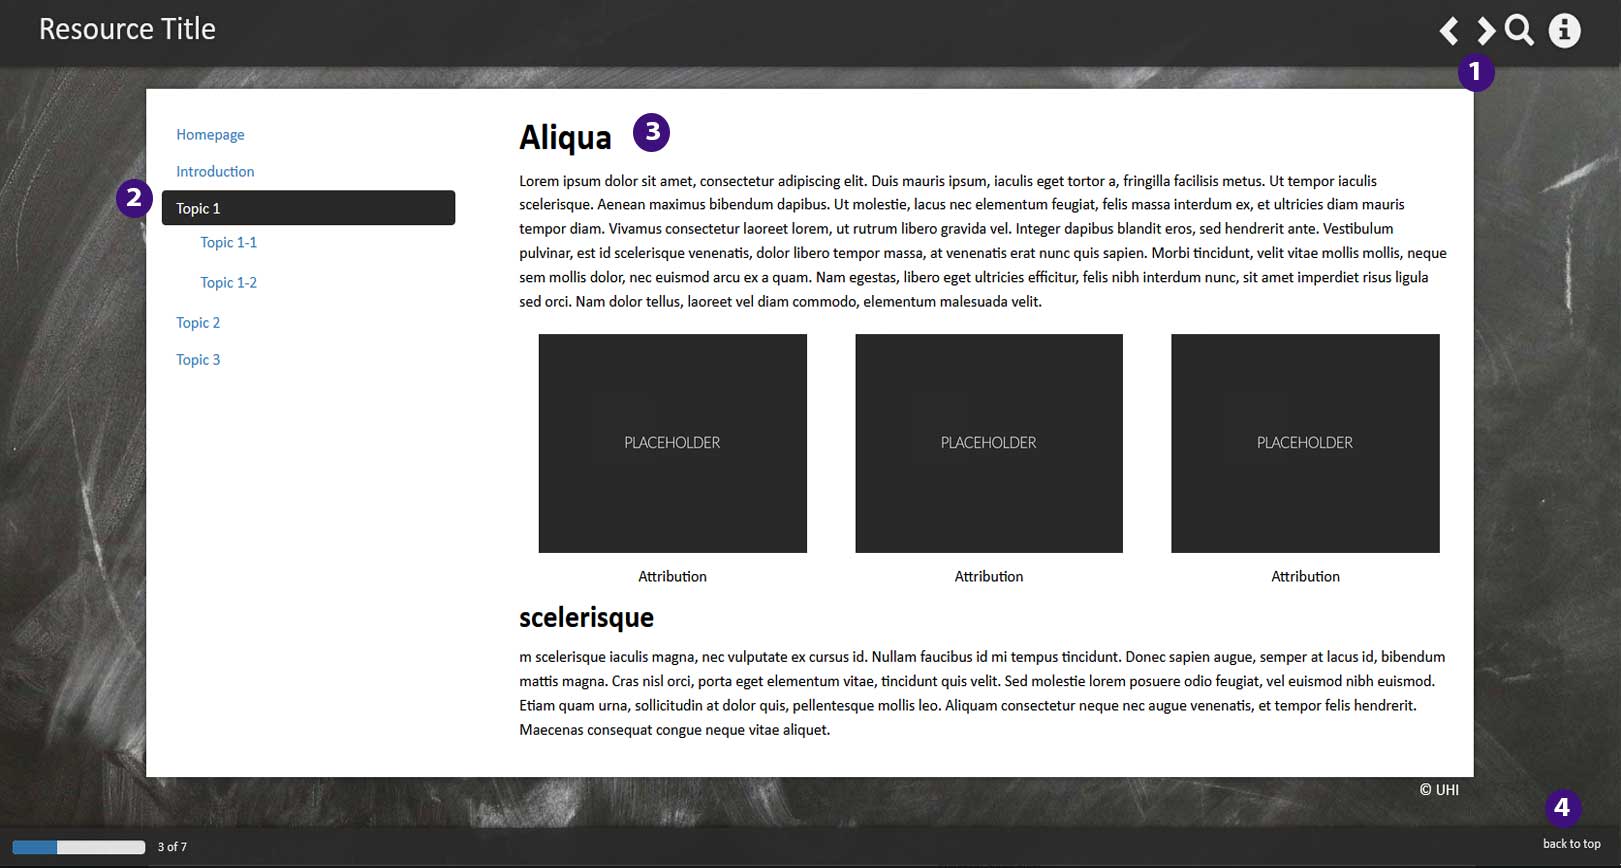
Create presentations using Brightspace ePortfolio presentation templates. Customise the banner on the top (1), the layout and navigation of your page (2), font size and type, etc. (Figure 13).
You as well as students can then add text, images or ePortfolio artifacts.
Here is an example of what a reflection looks like when added to a presentation. It seamlessly blends into the flow of the website, providing information on when the reflection was last modified (3). Students can choose whether they want to allow commenting for any artifacts they add to a presentation (4). When commenting is enabled, people viewing the presentation from a UHI Brightspace account will be able to add a comment (Figure 14).

Reflection

There are multiple ways that reflections can be used and brought into the ePortfolio.
Students can create reflections from scratch within the Brightspace ePortfolio. These can either be individual ePortfolio items in their own right then, or they can be added to collections or presentations.
When you upload content into your Brightspace module/unit, you always have the option to enable students to reflect on this particular item in the ePortfolio. Students can click on the "Reflect in ePortfolio" button to reflect on this piece of content in the ePortfolio:

The reflection will contain a tag with the name of the content item students reflected on.
Use case
Have students keep a reflection journal about the course content they engage with. Students can reflect on content topics and could organise their reflections in a collection or add completed reflections to a presentation.
You could also have students upload a version of an essay for peer-review. After their essay has been peer-reviewed and they have submitted a revised draft to the instructor who graded the essay, students can add the feedback and final submission as well as the first draft with the peer-review to a collection, and reflect on the process of editing their essay with the help of their peers.

Forms
Use forms to collect information from students or to give them a more structured reflection or evidence template.
When creating a form, you have the choice between many different types of questions or fields you can add to your form.
When students fill in a form template provided by you, a form response is added to the Brightspace ePortfolio as an artifact. Students can share them with you either automatically or manually, allow you to comment on them or asses the response.
Students can use and fill in a form template as many times as they need to.

Use case
You have set an assignment that requires students to collect evidence which they share with you as a collection or in a presentation. You could create a form template that will require students to acknowledge that they have included all the necessary items. Students fill out the form and add the response to their collection or presentation before sharing it with you. (Figure 15)
Sample form:

Best practice and tips
On the following pages, you will find information best practice and tips for using the Brightspace ePortfolio.
Please note that you can enlarge any of the screenshots on the pages in this section by clicking on them.
Once you have viewed the enlarged image, click anywhere on the screen to return to the page.

Tip 1 - Push vs Share

There are two ways of sharing items with other people.
You can push items, which is essentially like moving a whole folder with associated items to someone else. When you push a presentation or collection you set up for students, for instance, each student in your module/unit will get their own copy of the presentation or collection which they can customise. Use this option to allow each student to curate their own portfolio of evidence and reflection.
You can also share items, which essentially means giving people access to view, comment, edit and/or assess your artifacts, collections, reflections and presentations. Use this option if you want students to work in a group on the same artifacts, collections, reflections and presentations.
Push
- use for providing students on your module/unit with a template to work with
- reflections and learning objectives include their associated items;
- presentations and collections include the items they display;
- items include associated reflections;
- pushed items include associated rubrics, tags but not comments.

Search for users, sharing groups or courses (units/modules) you would like to push to:

Share
- use for sharing items with individuals or sharing groups to work on collaboratively
- allows you to set up separate permission options for each artifact, collection, reflection, presentation, and learning objective in your Brightspace ePortfolio so you can pick and choose what content you share with people and what they can do with it.
Select permissions for individuals you are sharing an item with:

Overview of all individuals an item is shared with as well as their permissions:

- allows you to send invitations to internal users when you share an item with them;
- allows you to leave them a message about why you are sharing the item and what you’d like them to do with it;
- invitation will be visible to them on their ePortfolio homepage.

Compose your invite and click send:

The person you invited will now see your invite in their 'Unread Invites' area.

Tip 2 - Provide Guidance and tips for structuring the ePortfolio

If you want your students to use the Brightspace ePortfolio, you should provide them with clear guidance on how to structure and organise their ePortfolio.
- Set expectations and standards.
- Establish naming conventions and explain tags.
- Agree on how students will submit their evidence: artifacts, presentations or collections?
- Establish if ePortfolio items will be assessed summatively or formatively.
The Educational Development Unit has developed a Student ePortfolio guidance template containing step-by-step guidance as well as short how-to videos for all possible use case scenarios.
This guide can be customised and shortened for any particular use case to give your students clear and concise support for using the Brightspace ePortfolio to avoid overwhelming them with too much information.
If you would like to find out more or discuss a particular use case you have in mind as well as bespoke guidance for your students, please contact edu@uhi.ac.uk.
Tip 3 - Set students low-stake practice tasks
To help them get used to the ePortfolio, set them some low-stake practice task so they can get their feet wet.
Example
Use case:
Students will take pictures throughout the semester, upload them to the ePortfolio and add them to a presentation
Practice task:
Ask students to take a picture that exemplifies one of their hobbies and have them upload it to the ePortfolio as well as add it to a page in the presentation they will use.

Use cases for the use of the Brightspace ePortfolio at the University of the Highlands and Islands
On the following pages, you will find the following use case examples from across the partnership which were supported by the Educational Development Unit:
- Collect and reflect on evidence;
- Peer review;
- (Reflective) Journal;
- ePortfolio for Group work.
Please note that you can enlarge any of the screenshots on the pages in this section by clicking on them.
Once you have viewed the enlarged image, click anywhere on the screen to return to the page.

Collect and reflect on evidence
This is probably the most popular use case. In most instances, students are asked to upload artifacts such as images, files and course results which are then added to an ePortfolio reflection or form allowing students to reflect on the evidence. The completed reflections or forms are added to an ePortfolio presentation to display them in a visually appealing way.
Types of evidence in the ePortfolio used:
- Artifacts (course results, images, files);
- Videos from other platforms which can be embedded in an ePortfolio Reflection or Brightspace Form Response;
- ePortfolio Reflections and/or Brightspace Form Responses which can be completed in writing or by recording a Brightspace Video Note;
- ePortfolio Presentation and/or Collection which evidence is added to.
Brightspace tools used in conjunction with the ePortfolio tool:
- Sharing Groups tool (for setting up sharing groups so students' work can be shared back with lecturers automatically).
- Optional: Forms tool (for setting up the Form Response templates);
What the lecturer did:
- Set up a presentation and/or collection students could use to display and organise their evidence;
- Add in instructions and examples;
- Push the presentation and/or collection to the students;
- Optional: Set up Form Response templates in the Brightspace Forms tool.
What students need to do:
- Upload their evidence (images, files) or add it to the ePortfolio (course results);
- Add the evidence to ePortfolio reflections, Form Responses, the presentation and/or collection and reflect on it or provide a narrative;
- Submit the completed presentation to the assignment tool at the end of the semester.

Peer reviews
For this more niche yet highly innovative use case, students are asked to use Brightspace forms to peer review fellow students they have worked with in a group activity. The completed forms are then added to an ePortfolio presentation and submitted to the Brightspace assignment folder to allow lecturers to review them.

Types of evidence in the ePortfolio used:
- Brightspace Form Responses;
- ePortfolio Presentation which completed peer reviews were added to.
Brightspace tools used in conjunction with the ePortfolio tool:
- Forms tool (for setting up the peer review Form Response template);
- Optional: Rubrics tool (for setting up a rubric which was used in the form).
What the lecturer did:
- Set up a presentation students could use to add the completed peer reviews to;
- Push the presentation to the students;
- Set up the peer review Form Response template in the Brightspace Forms tool;
- Optional: Set up the rubric used in the Form Response template using the Brightspace Rubrics tool.
What students need to do:
- Complete the peer review Form Response template for each fellow student they were reviewing;
- Add the completed peer reviews to the presentation;
- Submit the completed presentation to the assignment tool.
Reflective Journal
For this simple, yet effective use case, students are asked to either create ePortfolio reflections or complete a Brightspace form with pre-configured fields to reflect on or journal about their experience in the module/unit they are enrolled on. Completed reflections or forms can then be added to a presentation to help lecturers review the entries more easily and to provide the student with a journal they can export and take with them once they leave the university.
Types of evidence in the ePortfolio used:
- ePortfolio Reflections and/or Brightspace Form Responses which can be completed in writing or by recording a Brightspace Video Note;
- ePortfolio Presentation and/or Collection which completed reflections are added to;
- Optional: Artifacts (course results, images, files);
- Optional: Videos from other platforms which can be embedded in an ePortfolio Reflection or Brightspace Form Response.
Brightspace tools used in conjunction with the ePortfolio tool:
- Sharing Groups tool (for setting up sharing groups so students' work can be shared back with lecturers automatically).
- Optional: Forms tool (for setting up the Form Response templates);
What the lecturer did:
- Set up a presentation and/or collection students could use to display and organise their reflections;
- Add in instructions and examples;
- Push the presentation and/or collection to the students;
- Optional: Set up Form Response templates in the Brightspace Forms tool.
What students need to do:
- Complete the ePortfolio Reflections and/or Form Responses;
- Add completed Reflections and/or Form Responses to the presentation and/or collection;
- Submit the completed presentation to the assignment tool at the end of the semester;
- Optional: Upload or add any evidence (images, files, course results they might want to use in a Reflection or Form Response.

Group work
In this collaborative use cases, the ePortfolio is used to facilitate the creation of a shared presentation with embedded project documentation and outputs. Rather than working on their own, students in a group share one presentation and collaboratively upload and edit their evidence.

Types of evidence in the ePortfolio used:
- Artifacts (course results, images, files);
- Videos from other platforms which can be embedded in an ePortfolio Reflection or Brightspace Form Response;
- ePortfolio Reflections and/or Brightspace Form Responses which can be completed in writing or by recording a Brightspace Video Note;
- ePortfolio Presentation and/or Collection which evidence is added to.
Brightspace tools used in conjunction with the ePortfolio tool:
- Sharing Groups tool (for setting up sharing groups so students' work can be shared back with lecturers automatically).
- Optional: Forms tool (for setting up the Form Response templates);
What the lecturer did:
- Set up a presentation and/or collection students could use to display and organise their evidence;
- Add in instructions and examples;
- Share the presentation and/or collection with the group of students who needed access to it;
- Optional: Set up Form Response templates in the Brightspace Forms tool.
What students need to do:
- Upload their evidence (images, files) or add it to the ePortfolio (course results);
- Work collaboratively to add the evidence to ePortfolio reflections, Form Responses, the presentation and/or collection and reflect on it or provide a narrative;
- Submit the completed presentation to the assignment tool at the end of the semester.
Why should I use the Brightspace ePortfolio tool?
The new UHI Learning and Teaching Enhancement Strategy 2022-27 was launched in autumn 2022. This guidance refers to the previous version of the strategy and/or the previous set of Learning and Teaching Enhancement Values and will be updated during the current academic year. Until this guidance is updated to reflect the new LTES please feel confident to continue using it.
Using the Brightspace ePortfolio allows you to create active and engaging learning opportunities for your students.
In addition, using the ePortfolio for activities and continuous formative or summative assessment can allow you to help students develop employment and career management skills as described in the university's Graduate Attributes initiative. By supporting reflection, personal development aspirations and planning, most possible use case scenarios for the ePortfolio can help students gain digital literacy skills, self-management skills and interpersonal skills.
In addition, using the ePortfolio can help you embed various of the university's Learning and Teaching Enhancement Values such as “Learner choice and personalisation”, “Providing a connected learning experience” and “Active and creative use of technology”.

Where can I get help?
As mentioned before in this guide, the Educational Development Unit (EDU) has been able to support a number of use cases for the Brightspace ePortfolio across the partnership.
If you would like to find out more, discuss a particular use case you have in mind and learn about how we can support you in creating bespoke guidance for your students, please contact edu@uhi.ac.uk.
We will be able to showcase how the ePortfolio works and can advise on how to realise your use case idea. Moreover, we have created a Student ePortfolio guidance template containing step-by-step guidance as well as short how-to videos for all possible use case scenarios which we can customised and shortened for your particular use case to give your students clear and concise support for using the Brightspace ePortfolio.