Creating a blog using Mahara
If you want your students to create blogs in Brightspace, they will use software called Mahara. Mahara, is a ‘fully featured electronic portfolio system’ and is something we’ve had at UHI for a few years.
Mahara has several useful features that make it a good option for blogging, including the fact that it is by default private. To share anything with a lecturer or more widely, students will need to set that up manually.
The following pages detail the steps involved in creating a blog with Mahara.

Accessing Mahara
From the navbar in Brightspace go to Communication and Collaboration > Blog

Once logged in: The first screen you are taken to is the Dashboard. This welcome page offers links to various sources of help, Groups, FAQs etc. At the top of the screen you will see there are other areas of Mahara: Content/Portfolio/Groups/Site Information.

Completing your profile
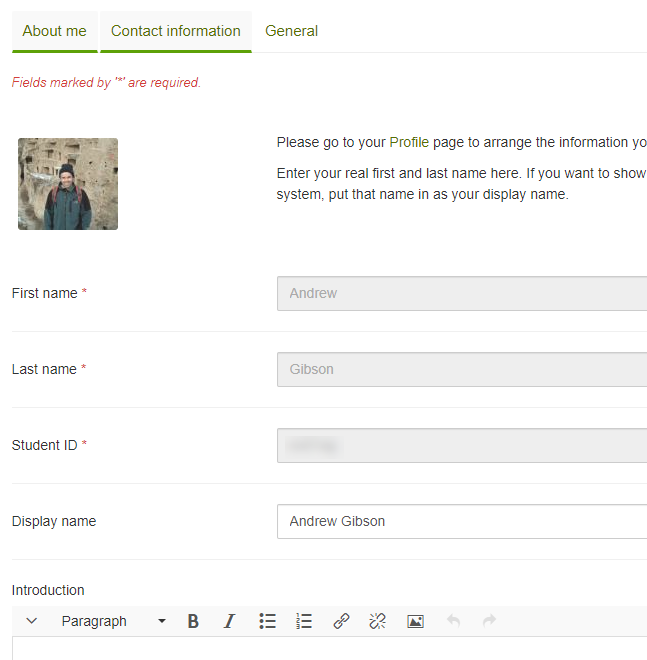
If your students are new to Mahara, the first thing they should do is complete their profile.
To do this, they click on the Content tab and then fill in About me, Contact information and General as appropriate.
When complete, they click Save profile.

Journals
In Mahara go to Content > Journals
Students will find already have access to one journal bearing their student ID. At this point they have a choice: they can either edit the existing journal or create a new one. This guide covers both these approaches in the sections below.

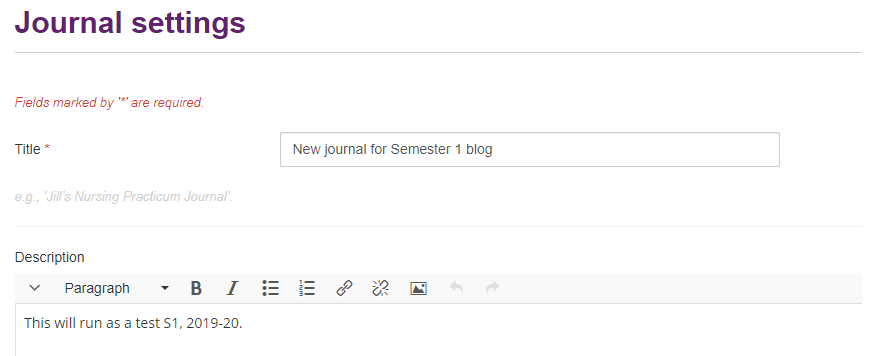
To edit the existing journal, students should click on the journal title, then Settings.
At this point they can rename the title of the journal, add a description of the contents and add tags to aid searching for the journal.
When complete, they click Save settings.

The journal is now ready for content to be added. To do so, students click on + New entry.

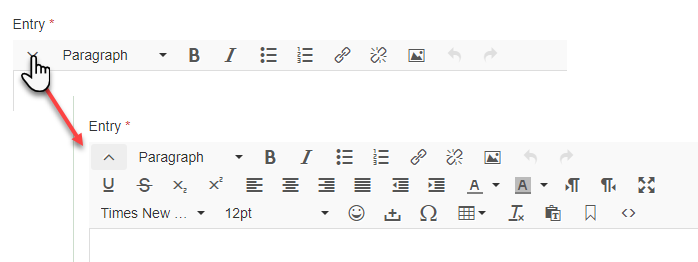
The journal entry screen has a full html editor, so can accept links, files, multi-media and allows for formatting of any sort. To open the full editor, students click on the downwards arrow at the left of the screen.
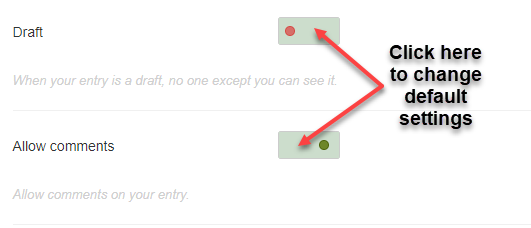
When students have added a title, content, and any additional files, they are asked if they wish to keep the post in draft format (not the default setting) – this would mean than even those with shared access to the blog could not see it; they are also asked if you will allow comments on your post (the default is to allow comments).
To change either of these default settings, students click on the green area (shown opposite).
When complete, students click Save entry.
Alternatively, if you wish students to create a journal from scratch, in Content > Journals, they begin by clicking + Create journal (opposite).
They are asked to give the journal a title, description and searchable tag/s, then click Create Journal.

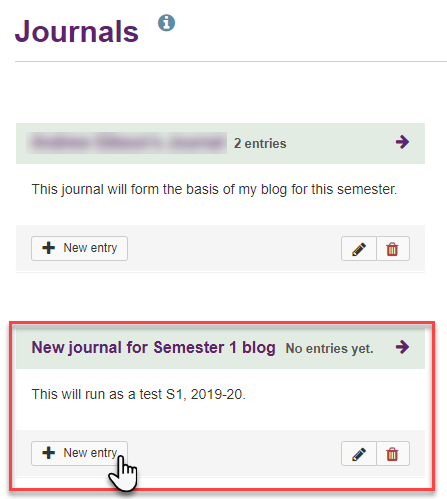
They will be returned to the Journals screen, and see their new journal listed (shown in the red box opposite).
To start adding content to the new journal, students click on the + New entry button.
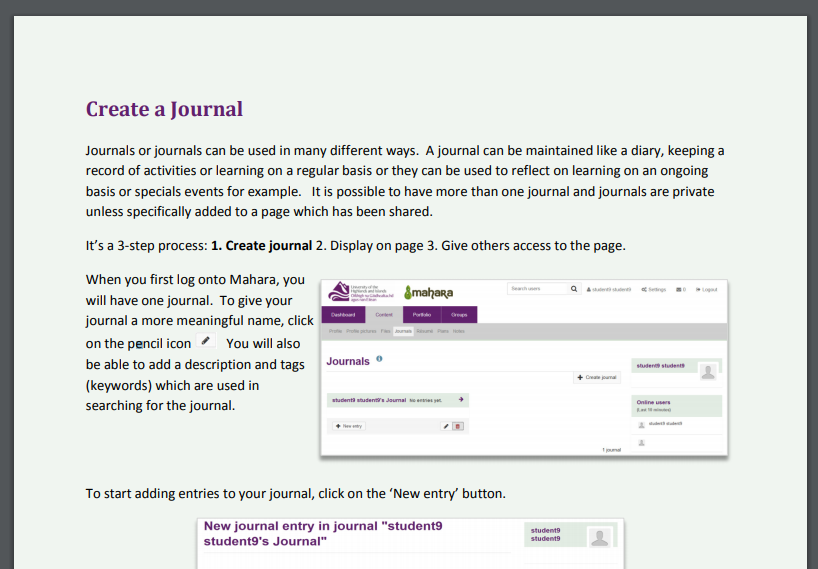
Further guidance on how to create a journal can be found by following: https://mahara.uhi.ac.uk/artefact/file/download.php?file=182224&view=8027
Clicking on the link above will download an illustrated PDF to your computer.
Displaying a blog on a page
To do this they click on the Portfolio tab in Mahara, this takes them Pages and collections page.

Their next step is to click on + Add.

And from the pop up, select Page.

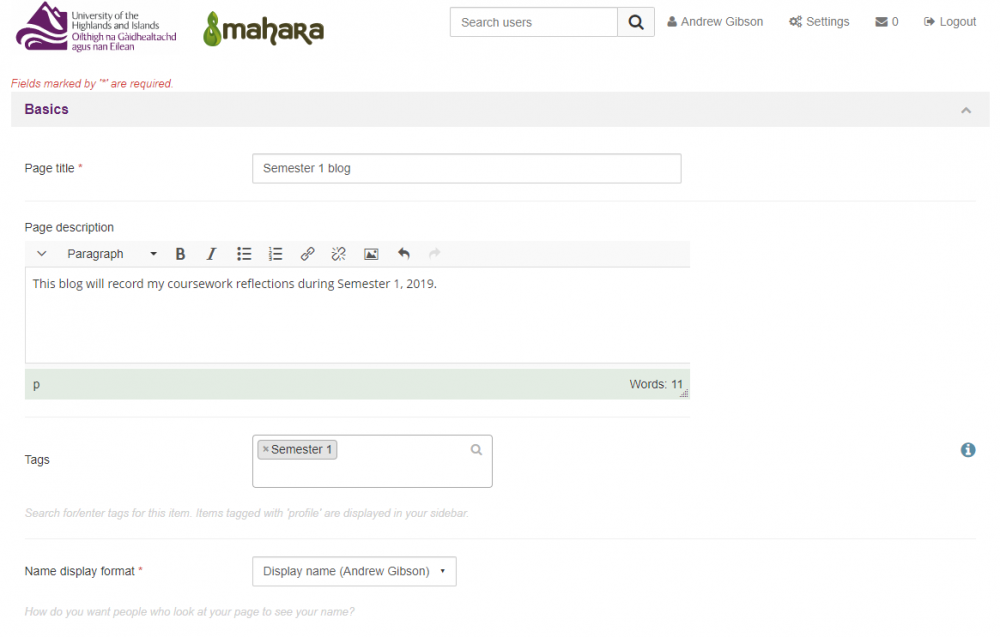
This leads to a screen called 'Basics'.
Students should name the page and add some basic information.
This page will essentially become your student's blog, pulling in the content from the journal they created.
They can add in a description and tag the page if they want.
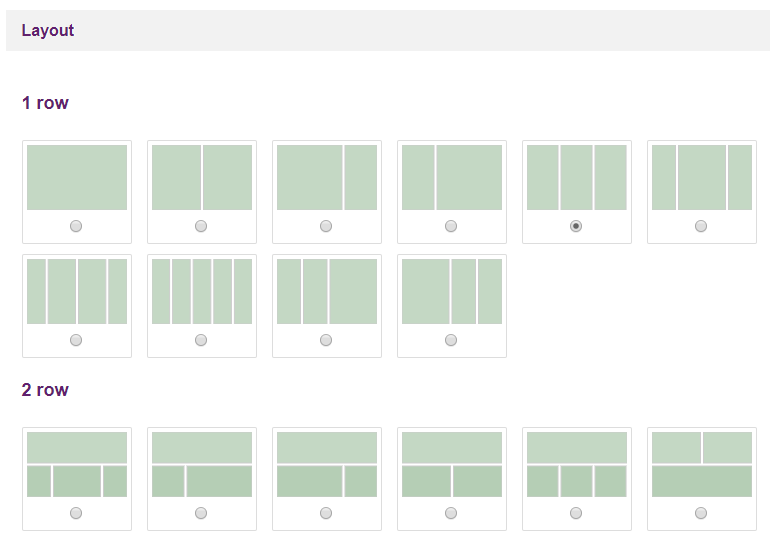
At the foot of the 'Basics' screen there is a section called ‘Layout’. Students click on this section to decide on how they want their blog posts to be displayed (full page width, 2 columns, etc.).
The default is 3 equal columns. Students can change it at this point, or in the future.
They can also change ‘skin’ which alters the appearance of headings and other formatting.
When finished, they click Save.
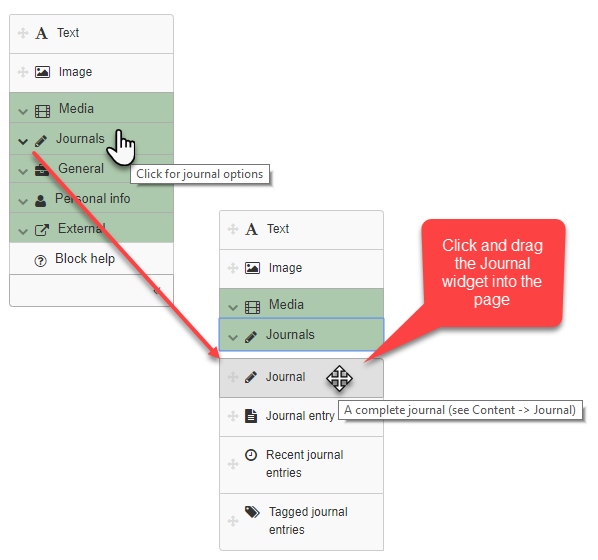
On the left side of the screen they should click on Journals to access a dropdown menu, then drag the Journal widget to the top of the blank part of the screen.
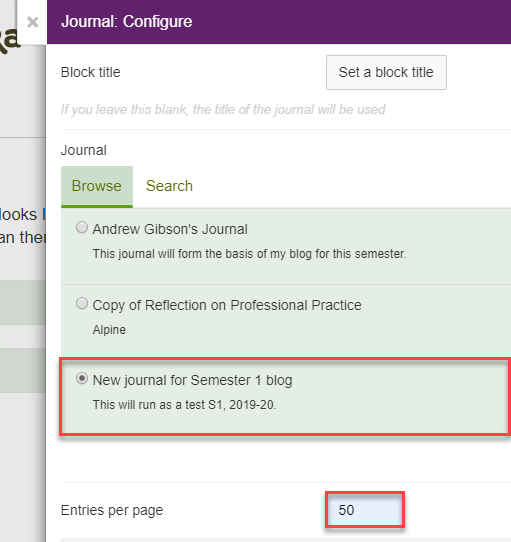
Dragging the widget into the page will cause the Journal: Configure screen to pop up.
From this screen they should select the journal they wish to make up the content of their blog. In the example opposite the journal is called ‘New journal for Semester 1 blog’.
Note: Advise your students to set 'Entries per page' to a high number like 50 - this means the page will grow with their journal and they won’t need to change the settings of the Journal block.
To complete, click Save.
Students will now see the journal they selected is listed in their blog page (shown opposite).
They can also use the Edit page to add many more widgets to their blog page (images, media, etc.). Note: It's important to remember that images, media, links, etc. can be added to any individual blog post – so this isn’t the only chance they will have to make their blog appealing.

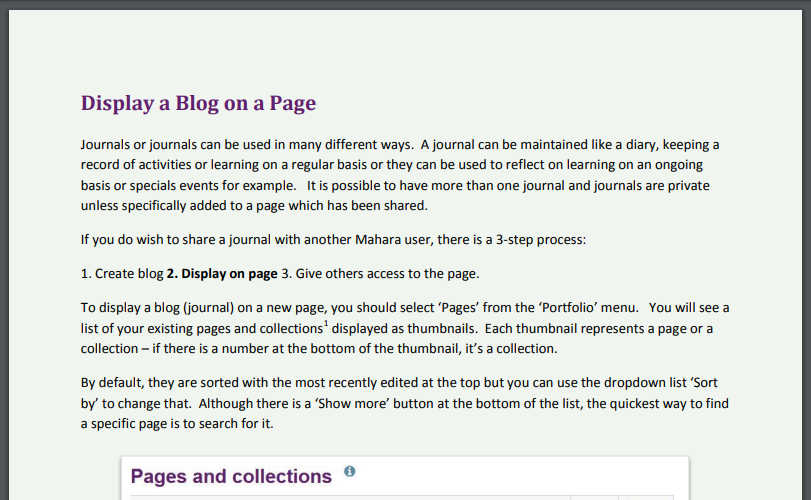
Further guidance on how to display a journal/blog can be found by following: https://mahara.uhi.ac.uk/artefact/file/download.php?file=194550&view=8027
Clicking on the link above will download an illustrated PDF to your computer.
Sharing a blog
To share a blog, students go to Portfolio > Pages and collections

Students should select the page that they wish to share (e.g. ‘Semester 1 blog’), then click on the three dots at the bottom right followed by Edit.
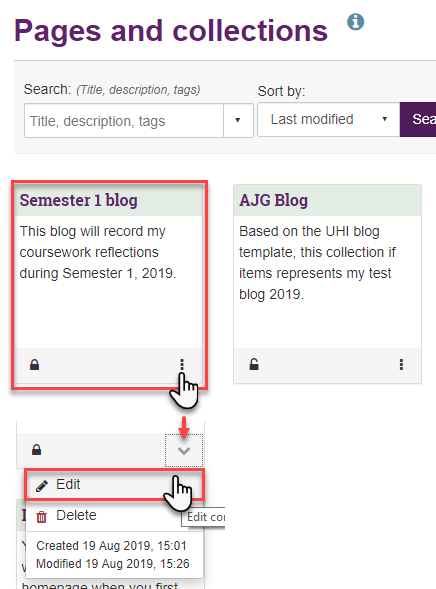
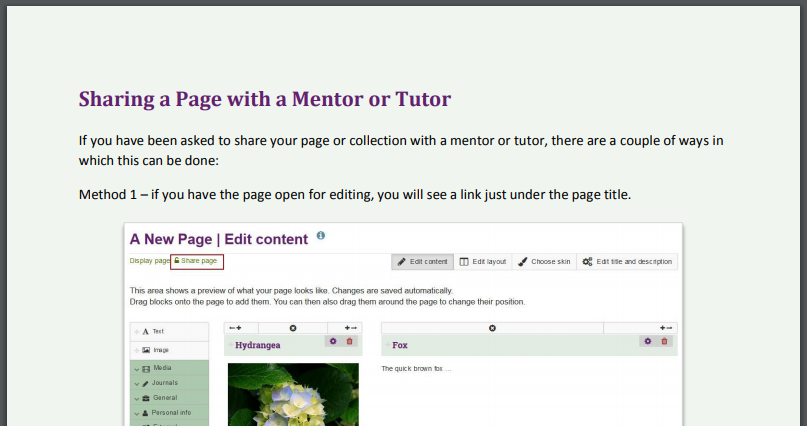
From the Edit screen, they select Share

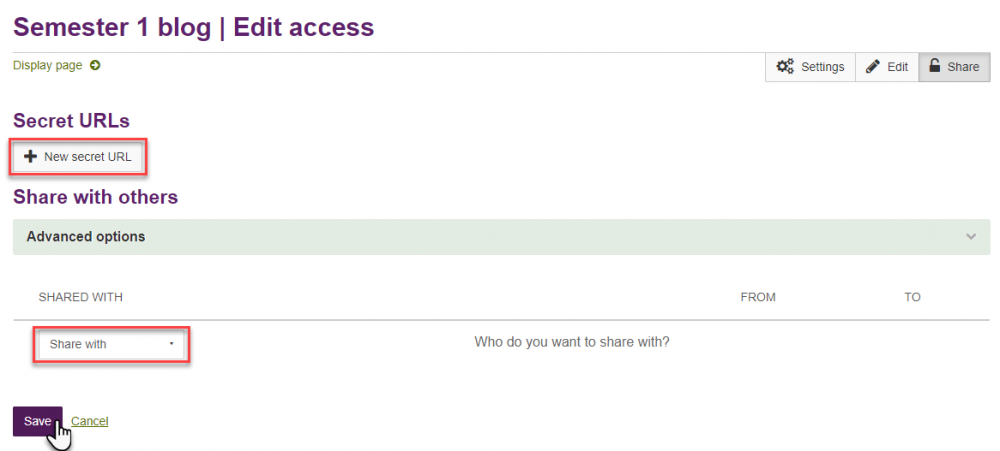
This takes them to the Edit access screen. From here they can either create a ‘secret URL’ – a link they can share, or they can use the drop down ‘Share with’ menu to select individuals or groups.
When complete, they click Save.
Further guidance on how to share a journal/blog can be found by following: https://mahara.uhi.ac.uk/artefact/file/download.php?file=182226&view=8027
Clicking on the link above will download an illustrated PDF to your computer.
