Turning a PowerPoint presentation into a video file using Office Mix
The following guide takes you through the steps involved in using PowerPoint plugin Office Mix to convert PowerPoint files into videos.
This plugin is especially powerful if audio is present as it will automatically keep the slide on screen for the duration of the audio, then move onto the next slide when it stops.
Step 1 – Make sure you have the Office Mix add-in
To create a video using Mix you first need to be sure you have installed the Mix add-in. If you have installed it already, you will see a Mix tab in your PowerPoint toolbar (Figure 1).
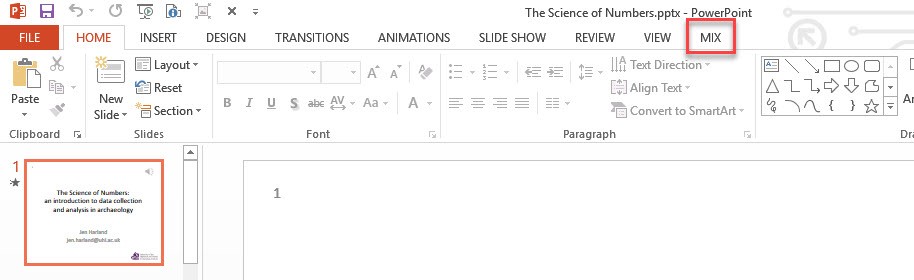
Figure 1: PowerPoint toolbar showing Mix tab
Note: If the Mix tab is absent, visit Microsoft’s Get Office Mix page and click on ‘Get Office Mix’. Once successfully installed you should see the Mix tab above when you open PowerPoint.
Step 2 – Open a PowerPoint presentation
The presentation may or may not feature audio - even if it doesn’t Mix can still be used to turn a presentation with timings into a video. For the purposes of this guide it is assumed you want to create a narrated video.
Step 3 – Create individual audio files for each slide
You can record audio directly from within PowerPoint, or use one of the many free tools, such as Audacity, to record your narrative content. The important thing is that you create separate audio files for each slide.
To create audio from within PowerPoint, click on the Insert tab > Audio > Record Audio (Figure 2)

Figure 2: Recording audio with PowerPoint
On clicking Record Audio, a popup (Record Sound) will appear (Figure 3). Use this to name the audio file (e.g. Slide 1). When ready to record, click the red dot; when finished click OK.
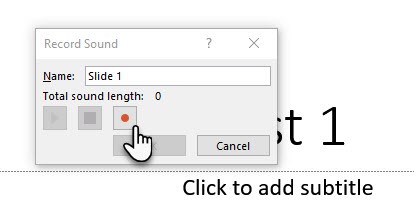
Figure 3: Record Sound popup
When you click OK you will see a grey loudspeaker icon appear on the screen. This is only present during recording and will not be visible in your final video. The icon can be moved to the corner of the screen if you prefer. To do this, click and drag the speaker icon (figure 4).
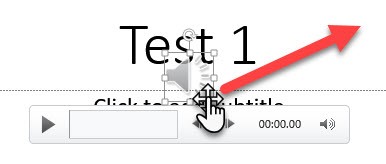
Figure 4: Moving recorded audio icon around the screen
You can review the audio you have recorded by clicking the play button (triangle left side Figure 4). If you are unhappy with it, simply click on the icon and delete; if you are happy move onto your next slide and repeat the process.
Alternatively, if importing audio, as in Figure 2, click on Insert > Audio but this time choose ‘Audio on my PC’. From this prompt, locate the audio file you wish (again, it’s easiest if you call your audio files ‘slide 1’ etc.).
When you have added audio to all your slides, save your presentation.
Step 4 – Converting to video
Next, click Mix > Export to Video* (Figure 5).
*You may see a popup saying Office Mix needs to update, if so click OK.
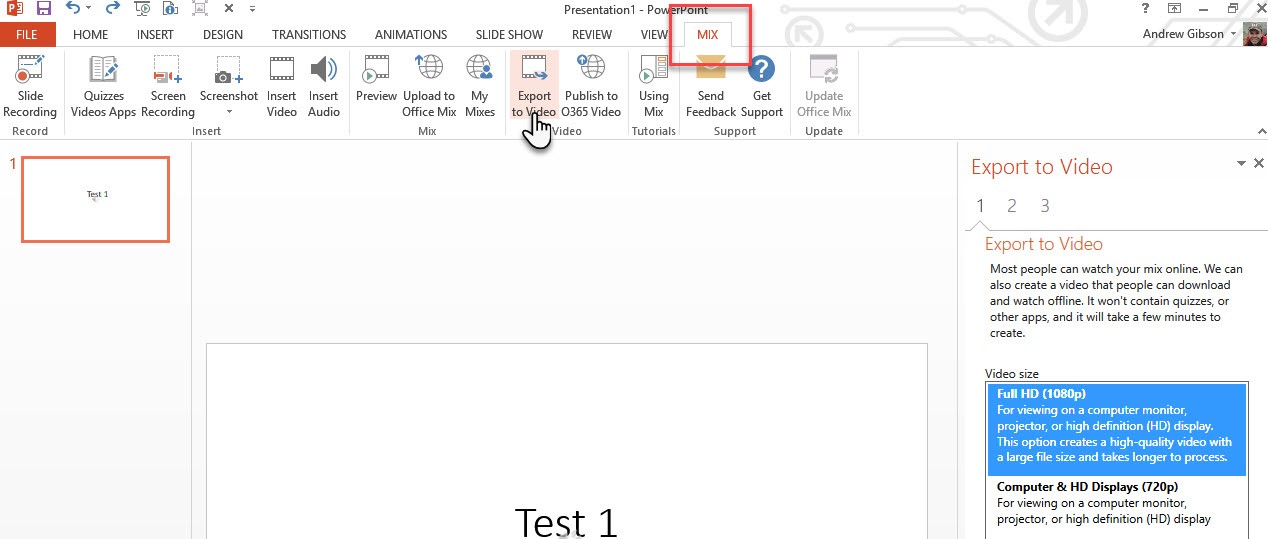
Figure 5: Mix - Export to Video
From the options on the right of the screen, select Video size – naturally, the higher the resolution (e.g. 1080p) the bigger the file. You can test a couple of the options to see if you feel there’s a significant difference in the results.
Below the video size options, you will see ‘Seconds spent on each slide [x]’. Note: This only applies to any slides that contain no audio, e.g. a title slide, or end credits; slides with audio will stay on the screen for the duration of the audio clip. Once happy, click Next.
Step 5 – Choose the name and location of your video
On clicking Next, you will be asked to name your video – and select a folder/location on your computer to save it to. The only available file type is .mp4 – this is a standard and highly compressed format. Click Save. At the foot of the screen you will see a progress bar ‘Creating ‘[your file name].mp4’ – for large presentations this can take a long time – be patient.
Step 6 – Success!
When PowerPoint has finished rendering your video you will see a Success message in the top right of the screen (Figure 6). At this point click Close at the bottom right of the screen.
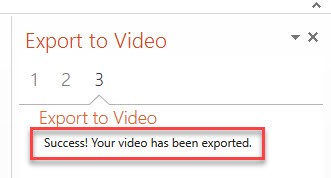
Figure 6: Successfully completed video
You have now successfully created a video from within PowerPoint. If using for teaching, you can either upload directly, e.g. to a Blackboard item (for smaller files), or upload to the UHI streaming server (for larger files), which you can link to from within Blackboard.
All efforts have been made to ensure materials created by the EDU comply with current accessibility guidelines (JISC: Support for learners with disabilities).
If further assistance is required with accessibility matters please contact the student support section in your academic partner UHI: Accessing learner support.
Links
Unless otherwise stated all external links will open in a new tab/window
We welcome any comments on how to improve this unit. Please feel free to pass these on at any time.
If you have any difficulty viewing this resource please contact EDU (edu@uhi.ac.uk) with:
- the name of the resource;
- a description of the problem (please give as much detail as possible);
- the section of the resource where the problem occurred;
- your internet browser (you can check your browser version at: http://detectmybrowser.com/).
UHI provides links to external sources of information and may refer to specific Web sites, products, processes or services within this resource. Such references are examples and are not endorsements and whilst every effort is taken to ensure the accuracy of information provided UHI is not responsible for any of the content or guidance. You are advised to exercise caution.
Download a copy of this resource in PDF format.
You can also print individual pages by printing directly from the browser.