Introduction
Within UHI, second markers need to be able to share comments about student work with other makers, without students seeing that information. The Grades area of Brightspace does not automatically feature such a space for second markers to use; however, there is a way to use the Rubric function within the Assignments tool to create an area for second markers to comment on student work.
The procedure for this is illustrated on the next few pages.
Additional guidance
In addition to this guide, the EDU has produced a comprehensive guide to Assignments, feedback and grades. Visit this resource to learn all about the Assignments tool, including activating Turnitin, and Grades.

Create/Edit Assignment
Follow these steps
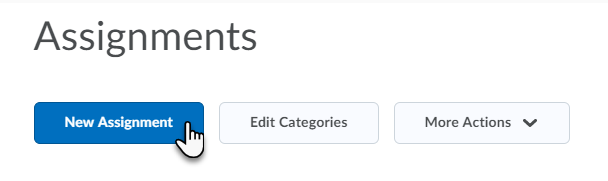
The first step in the process to giving second markers the ability to add comments intended for other markers, and not students, is to go to Course Tools > Assignments

If creating an assignment from scratch begin by clicking New Assignment
Otherwise, scroll to the existing assignment you wish to add the rubric to.
To edit an existing assignment use the dropdown menu to the right of the assignment and click on Edit Assignment

The Create/Edit Assignment screen has 4 tabs: Properties, Restrictions, Objectives and Turnitin.
In Properties scroll down and click on Create Rubric in New Window (shown opposite)

Create Rubric
Follow these steps
Having clicked on Create Rubric in New Window in the previous step, you should now be looking at the Edit Rubric screen. We are going to reduce the number of options showing on the screen. On the Edit Rubric screen:
- Name the Rubric, e.g. ‘2nd marker’s comments’
- Stick with Type: Analytic
- Change Scoring to ‘No Score’
- Delete all but one Level, e.g. Level 4 (by clicking on the bin icon) and rename it '2nd marker comments’
- You can also remove all the Criterions except one – and rename it ‘Comments added’
Making these changes leaves you with (picture opposite)

There are again 4 levels automatically present. Remove 3 and rename the remaining one something like ‘2nd marker completed’. You won’t be posting a score here, this will indicate to the other markers that a 2nd marker has left comments regarding a particular student. Your screen should now look something like (picture opposite)

Next, click on Options to expand the available options (shown opposite)
- In Rubric Visibility – change to ‘Rubric is hidden from students’
- In Score Visibility, check the box ‘Hide scores from students’
- And in the Comments box add as appropriate.
- Leave the check marks in the Competencies or ePortfolio associations boxes.
- Click Close.
There is nothing more you need from this screen. You can now close the Rubrics browser window (Edit Assignment is still open in another window).

Add Rubric
Follow these steps
Having closed the Rubric window, you are returned to the Edit Assignment screen.

In Edit Assignment, scroll down and click on Add Rubric.

From the Select Rubric popup box, put a check beside your 2nd markers rubric, and click Add Selected.

Then at the bottom of the screen, click Save and Close.

Adding feedback/ Grading
Follow these steps
Having added a 2nd marker's rubric to your assignment, and clicked Save and close to complete that process, you should now be back at the Assignments screen (if not – go to Course Tools > Assignments)

To add comments to submissions (or to just check everything is in place before students submit) click on the assignment with the 2nd marker's rubric (opposite)

Clicking on the assignment name gives you an overview of all users and their submissions. You can also see Turnitin Similarity scores (if activated in the assignment), due date information, etc.
To view a submission, click on the file the student has attached (opposite)
This brings up the submission screen. In the main body of the screen you will have access to the student’s submission – and on the right side of the screen, under Evaluation and Feedback you should see a link to the 2nd marker’s rubric.


Clicking the rubric causes a pop up to appear – firstly, a 2nd marker should click on Add Feedback.
This brings up a text box ('Criterion Feedback' shown below). 2nd markers can add as much text as they wish to this box:


When finished, they should click in the box highlighted in purple (opposite):

After that, they should click the box listed under Overall Score (in our test example labeled '2nd marker completed') opposite.
This will identify to other markers that the 2nd marker has added comments.
Then click Close.

The 2nd marker is returned to the Submission screen – and on the right it is clear that comments have been recorded. Important: to complete the process, the 2nd marker should click on Save Draft (not Publish) at the bottom right of the screen.

Viewing a list of students who have received second markers' comments [and those that have not]
Follow these steps
One fairly likely scenario for those using second marker's rubrics in Brightspace is that someone (either internal or external) will want to quickly see which students have recieved comments, and which have not (remain outstanding). To do this, follow the steps below:
In Assignments, select an assignment where a second marker's rubric is in use. After clicking on the name of the assignment, click on the Submissions tab. Follow this by clicking on the first listed submission (see picture opposite, click to enlarge).

You will now be looking at the student submission. To the right of the submission, in the Rubrics area, click on the graph icon to the right of the second marker's rubric ('Rubric statistics').

Next, you have the choice of three tabs: Overall, Criteria Statistics and Individual Statistics. Select Individual statistics (picture opposite).
At this point you will be able to see a listing of all those enrolled on the module and Level: Completed beside those that have second marker's comments (this box will be blank for any still requiring comments to be added).