Planning for a Collaborate tutorial
“Student responses infer that online classrooms should build on course content from the perspective of application which may also include applying concepts related to completion of assessment tasks. Students would prefer to see value in attending the session i.e. apply the knowledge learnt together as a cohort (discuss, engage etc.) rather than revise or rehash content” (Bodey, K., Ravaga, V. & Sloan, S., 2016, p54).
Therefore the benefit to students is in using the Collaborate tutorial for activities that apply and extend the knowledge gained by working through the set learning resources at home rather than only using the tutorial to revisit the content. The inclusion of activities and group work are the key to running a ‘best practice’ Collaborate tutorial.
Here are some considerations when planning for your tutorial and an example lesson plan.
Considerations
- Ensure the tutorial has a focused topic.
- Plan activities that are simple, short, focused, and learner centric.
- Plan an opening icebreaker- it could be personal introductions or a more structured exercise. Plan the icebreaker to make sure that students are comfortable with the Collaborate features and understand the etiquette. As the weeks progress the icebreaker can shift from a more introductory/’getting sorted out’ emphasis to something more substantial - perhaps a recap or quiz question that relates to information from the previous week’s Collaborate session.
- Plan activities that assess student understanding of the content studied at home, particularly activities that extend and reinforce what they were set to learn that week. You could also plan activities towards the end of the module that are useful for revision purposes, for the whole or part of the unit or module. Plan activities that allow peer-to-peer and student-to-lecturer sharing and encourage comments and discussion.
- With a little creativity and thinking time, you can convert almost all your classroom exercises to an online format. For example, groups can work on the Collaborate whiteboard while they discuss a problem in a similar way that they would use a whiteboard in the classroom to complete a collaborative exercise.
- Avoid slipping into the broadcast mode of delivery where you are ‘delivering a lecture’ rather than allowing the students to participate in active learning.
- Plan in prompts for discussions and use these to introduce new topics, encourage feedback and bring ‘off-topic discussions’ back ‘on-topic’. However, this is a balancing act; try not to over ‘manage’ the student discussion with too many prompts and interrupts but still keep students focused on the topic.
- Plan so that you do not have situations where you ask (particularly in a quiet class) an open-ended question and receive complete silence from the class! This is where the polling tool is useful as it forces the tutor to frame questions with succinct answers so, for example, if a tutor is not getting much discussion or feedback from an open discussion question, they could re-frame it and insert a poll into the session to start drawing out the students and getting them to participate.
- Combine Collaborate sessions with other tools (e.g. email, wiki, discussion fora), to run shorter concluding live discussions, following lengthier asynchronous collaborative working.
- Experiment with break out rooms to split larger cohorts into smaller (more manageable) peer learning groups. This is the ideal setting for a micro teaching session for each group. This approach exemplifies the necessary ‘learner centric’ pedagogies crucial for effective use of Collaborate.
- If you are finding it hard to juggle the moderator role of taking care of all the practical button pushing, with the tutor role of directing and facilitating the activities, try experimenting with having a nominated student to assist with the moderating task. If trying this approach, practice at least once before any sessions.
- Accept that some things are not going to work or work every time so discuss with your students and peers why something may not have worked and how you can improve it.
- Design your session with some sort of student activity every 5-10 minutes. In a tutorial session of one hour for example, this may mean planning around 6 activities or so, depending on their length. If you do have to present material, try not to present more than 10 to 15 minutes of content at one time without some sort of interaction, sharing of experiences, or group activity.
At the start of class where the open-ended question is asked “Has everyone read the week 1 home learning content?” and there is silence, change the question to an instruction and give it at the previous class for example, “Read chapter 8 and I want each of you to tell me at the start of next class, what you felt was the most important factor in the case study.” Then at the start of the next lesson ask each person for their factor. This will soon sort out who has not read the material as well.
Example
- The tutor starts with an introduction to the week’s topic, updates the class on where they are in the module schedule and any other necessary course information and goes over the etiquette rules. An icebreaker activity could go in here too (5 -10 minutes).
- The tutor draws something on the whiteboard or shows an image relating to the learning content the students have worked through at home and poses a question. This may also be an item that students indicated that they had difficulty with. The students discuss the item and the question (10 minutes).
- The tutor does a poll with a question relating to the whiteboard diagram or image and the discussion (5 minutes).
- Students are given another question or problem and go to Collaborate breakout rooms to discuss then each group comes back with an answer (15 minutes).
- The class discuss the answers they fed back, with the tutor giving prompts and keeping the discussion ‘on track’ (10 minutes).
- The tutor explains how this question relates to the learning outcome and the upcoming assignment (10 minutes).
- The tutor allots time to answer student questions about the activities or the content (5-10 minutes).
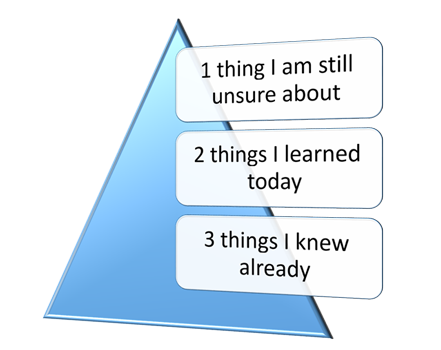
Use an end of tutorial exercise to find out how your students are progressing such as the pyramid:
- 1 thing I am still unsure about
- 2 things I learned today
- 3 things I knew already.
All efforts have been made to ensure materials created by the EDU comply with current accessibility guidelines (JISC: Support for learners with disabilities).
If further assistance is required with accessibility matters please contact the student support section in your academic partner UHI: Accessing learner support.
We welcome any comments on how to improve this unit. Please feel free to pass these on at any time.
If you have any difficulty viewing this resource please contact EDU (edu@uhi.ac.uk) with:
- the name of the resource;
- a description of the problem (please give as much detail as possible);
- the section of the resource where the problem occurred;
- your internet browser (you can check your browser version at: http://detectmybrowser.com/).
UHI provides links to external sources of information and may refer to specific Web sites, products, processes or services within this resource. Such references are examples and are not endorsements and whilst every effort is taken to ensure the accuracy of information provided UHI is not responsible for any of the content or guidance. You are advised to exercise caution.
Audio
Video
Reading
Download
Information
External link
Activity
Question
Asterisk
Discussion
Collaboration
Reflection/journal/log
History
Pause for thought
Download a copy of this resource in PDF format.
You can also print individual pages by printing directly from the browser.